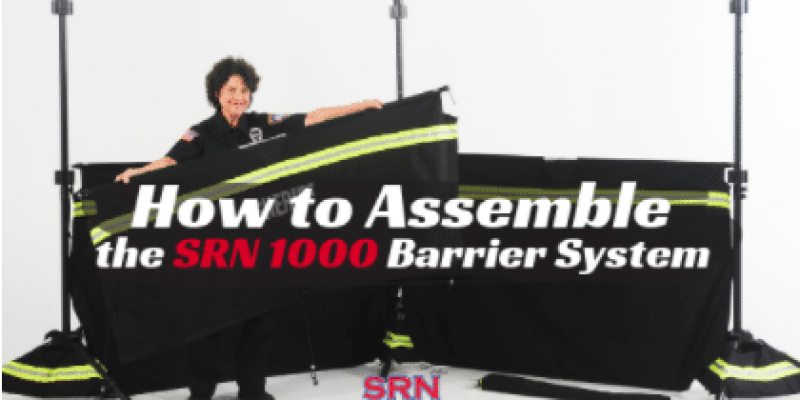
When you arrive on the scene of an emergency, there isn’t much time to react. What if we told you that there is a barrier system that can secure the perimeter of the area and protect the privacy of the victims involved? Our system of convertible screens and tripods does just that. The entire system can be set up in a matter of five minutes, and is so lightweight that it only requires one person for assembly.
The SRN 1000 is not only convenient in matters of emergency, it can also be used in a variety of scenarios to create privacy, security and safety for hospitals, schools, arenas, hotels, event arenas, airports and much more.
Each barrier consists of three steel tripods, two top barriers and two bottom barriers made out of all-weather, 500 denier fabric and three 15 pound ballast bags made out of 1000 denier, all weather fabric. Everything fits within two travel bags that are provided with the purchase of the barrier system. The SRN 1000 can be assembled in a few easy steps.

1. Assemble the Tripods
First, begin by assembling one of the three tripods. Loosen the knob on the tripod, then extend all three legs and push them down to the stop ring. Tighten the knob to fix the legs in place. Lift one of the 15 pound ballast bags over the tripod and slide it down to the base so that it’s placed evenly around each leg. Each ballast bag contains sand to help reinforce the tripod to withstand winds up to 30 mph. If you forget to place the ballast bag around the tripod before attaching the barriers, each bag has a zipper. Simply unzip the ballast bag and wrap it around the base of the tripod. Zip up the ballast back to secure it around the tripod.
Repeat this step with the two remaining tripods. Don’t worry about the distance between each tripod because you can adjust the distance later.
Now, raise the tripod to the correct length. You can do so by loosening the knob located below the two turrets, which are circular systems connected to the pole of each tripod that are used to connect the barriers and complete the system. As you lift the pole, you will notice a small hole outlined in yellow. Continue to lift the pole. The correct length is marked by another small hole outlined in red. Lift the bar until the full circle is visible. Either tighten the knob to set it in place, or insert the metal pin attached to the knob into the red hole. The bottom turret will rest right above the knob. If you choose to tighten the knob to set the length of the tripod, you can place the pin in the hole outlined in yellow to secure the turret in place. Repeat these steps for all three tripods.
2. Attach the Barriers
The next step is to attach the barriers to the tripods. Position the tripods so that there is a left, middle and right tripod parallel to one another. You can attach the barriers from left to right or right to left, but for the purpose of this post, we will begin on the left side. In the travel bag, there are two top barriers and two bottom barriers. Start with the two bottom barriers, which are taller than the top barriers. If you decide to brand your barrier system, you can also identify the bottom barriers as the ones not marked with your logo.
The fabric of the barriers are attached to a metal pole. Unroll the fabric and you’ll notice that there are magnets in both the right and left side. Pull them apart and connect the metal pole, which is split down the middle to help condense the system when it is deployed. The metal pole is located at the top of the barrier.
On both ends of the metal pole are detent pins.This is how you will connect the barriers to the tripods. Begin with the left side. Place the detent pin into one of the holes in the bottom turret. The turrets revolve around the tripods, giving you the option of positioning the barriers at any angle. Repeat this step on the right side by placing the detent pin the other end of the pole into one of the holes of the turret on the middle tripod. You will then attach the second bottom barrier in between the middle tripod and the right tripod. The magnets in the left and right side of the barriers are there to secure the barriers to the steel tripods. To attach the top barriers, follow the exact same steps from left to right.
3. Secure the Barriers in Place
Each corner of each barrier is equipped with a bungee cord that can be fastened to the turret to protect against the wind. To attach them to the turret, pull up the detent pin from the barriers and place the loop at the end of the bungee around the pin. Then replace the pin back in the turret. As the wind blows, it will pull the barriers from the tripods. The resistance against the bungee cords will pull the fabric back in place, reattaching the magnets to the tripod.
Once you are done attaching the two top barriers and the two bottom barriers to the three tripods, you will have a fully functioning barrier system that can be angled in different directions.
If you need the barriers to extend around a larger area, it is easy to add additional systems by adding more panels to extend the length of your system.
Each system comes with three beacons that can be attached at the top of each tripod (additional proprietary lighting is available). Each beacon is fitted with a magnet to keep it in place. These are optional. In the event, that the ground is not leveled, there is a silver foot on one leg of each tripod. Pull the silver foot down to hike the leg up. Turn the knob to set it in place to make the system level.
A unique canopy is available that is specifically designed for the SRN 1000 barrier system!


